A flame test is a laboratory procedure used to identify metal ions by observing the colored flame produced when metal salts are heated․ This lab helps students understand the relationship between elements and their characteristic flame colors, enhancing their knowledge of periodic trends and chemical properties․
1․1 Purpose of the Flame Test Lab
The purpose of the flame test lab is to identify metal ions by observing the characteristic colors produced when their salts are heated in a flame; This lab helps determine the relationship between elements and their flame colors, aiding in understanding periodic trends․ By heating metal salts, students observe how different metals emit distinct colors, such as sodium’s bright orange or copper’s blue-green․ This procedure allows for the identification of unknown substances and demonstrates how atomic structure influences light emission․ The lab also highlights the importance of careful observation and accurate recording of data․ Through this experiment, students gain hands-on experience with chemical properties and spectroscopy principles․ Additionally, it helps develop critical thinking skills by analyzing results and overcoming challenges like similar flame colors or low concentrations of ions․ Overall, the flame test lab is a foundational exercise in chemistry, linking theoretical knowledge to practical applications․
1․2 Importance of Flame Tests in Chemistry
Flame tests are a fundamental analytical tool in chemistry, offering a simple yet effective method to identify metal ions․ The distinct colors produced when metal salts are heated provide a visual representation of atomic structure, making it easier to understand periodic trends․ This technique is particularly valuable for introductory chemistry labs, as it introduces students to spectroscopy and elemental analysis․ Flame tests are also cost-effective and require minimal equipment, making them accessible for educational purposes․ Beyond education, flame tests have practical applications in industries like metallurgy and forensic science for quick material identification․ However, their limitations, such as difficulty in detecting low ion concentrations and potential flame contamination, highlight the need for complementary analytical methods; Despite these challenges, flame tests remain a cornerstone of chemical education and a practical tool for identifying metal ions in various settings․ Their simplicity and visual appeal make them an engaging way to explore chemical principles․
Materials and Equipment Needed
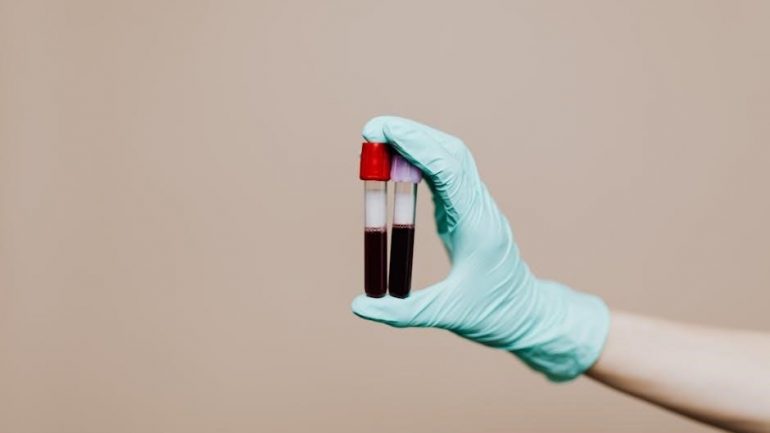
The flame test lab requires a Bunsen burner, metal salt solutions, clean Q-tips, a flame test wire, distilled water, and a data table for recording observations․ Safety goggles and gloves are essential․
2․1 List of Chemicals and Compounds
The flame test lab typically involves metal salts dissolved in water to form ionic compounds․ Common chemicals include sodium chloride (NaCl), potassium chloride (KCl), calcium chloride (CaCl₂), lithium chloride (LiCl), copper(II) chloride (CuCl₂), and strontium chloride (SrCl₂)․ These compounds are chosen for their distinct flame colors, such as sodium’s bright orange, potassium’s lilac, and copper’s blue-green․ Additionally, distilled water is used to clean equipment, and ethanol may be used to sanitize Q-tips or wires․ Safety precautions require handling these chemicals with care to avoid skin contact or ingestion․
2․2 Essential Lab Equipment
Conducting a flame test requires specific equipment to ensure safety and accuracy․ A Bunsen burner is the primary tool, providing a controlled flame for heating the metal salts․ A tripod or heat-resistant mat is used to stabilize the burner․ Glass rods or clean, dry Q-tips are dipped into the solutions and held in the flame․ Non-metallic holders or tongs are necessary for handling hot equipment․ Safety goggles and lab gloves protect against potential splashes․ Distilled water and ethanol are used for cleaning and sanitizing․ A well-ventilated lab setup is crucial to avoid inhaling fumes․ Preparing these materials ensures a smooth and safe experiment, allowing students to focus on observing and recording the flame colors accurately without unnecessary distractions or hazards․

Procedure for Conducting the Flame Test
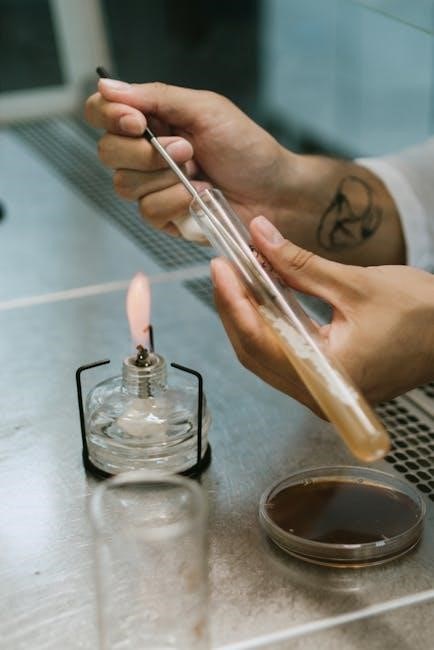
Begin by lighting and adjusting the Bunsen burner to produce a clean, blue flame․ Prepare metal salt solutions and test each by dipping a clean Q-tip into the solution and holding it in the flame․ Observe the resulting color and record your findings․ Ensure proper cleaning and disposal of materials to maintain a safe and organized lab environment throughout the experiment․
3․1 Preparing the Bunsen Burner
Before conducting the flame test, ensure the Bunsen burner is properly set up and adjusted․ Place the burner on a heat-resistant surface and connect the gas and air hoses securely․ Light the burner using a match or lighter, holding the flame to the ignition port․ Adjust the air intake to produce a clean, blue flame with a sharp inner cone․ This setup ensures optimal heat and minimal impurities in the flame, which is crucial for accurate results․ Once the flame is stable, perform a final check to ensure there are no leaks or irregularities․ Proper preparation of the Bunsen burner is essential for safety and achieving consistent, reliable flame colors during the test․
3․2 Testing Each Metal Salt Solution
To test each metal salt solution, dip a clean q-tip into the solution and hold it over the Bunsen burner flame․ Ensure the q-tip is moist but not dripping․ Hold it near the edge of the flame to observe the color change․ Record the flame color immediately, as it may only appear briefly․ Repeat this process for each solution, using a different q-tip each time to avoid cross-contamination․ After testing, rinse the q-tip with water and dispose of it properly․ This method ensures accurate results, as any residue from previous tests could alter the flame color․ Always handle the q-tip carefully to avoid burns․ The distinct colors produced by each metal ion will help identify the elements in the solutions․ This step is critical for gathering data and drawing conclusions about the chemical composition of the salts tested․
3․3 Observing and Recording Flame Colors
Observe the flame carefully as the q-tip is held in the fire․ Note the color change around the outer edge of the flame, as this is where the characteristic color is most visible․ Record the observed color immediately in a data table, using precise descriptions․ For example, colors like bright red, blue-green, or yellow-orange are common for specific metals․ Ensure consistency in recording to avoid discrepancies․ If the color is faint or fleeting, repeat the test to confirm․ Some metals produce similar flame colors, so accurate observation is crucial․ Documenting the results systematically helps in identifying patterns and differences between metal ions․ This step is essential for analyzing and interpreting the data collected during the experiment․ By carefully recording flame colors, students can draw meaningful conclusions about the elements present in each solution․
3․4 Cleaning and Disposal
After completing the flame test, turn off the Bunsen burner and allow it to cool before handling; Dispose of any used q-tips or splints in a designated waste container․ Clean all equipment, such as the Bunsen burner and tongs, with water to remove residual chemicals․ Properly label and store the metal salt solutions to prevent contamination․ Wash hands thoroughly with soap and water after handling chemicals․ Ensure the lab area is tidy and free from hazards․ Dispose of any chemical waste according to school or laboratory guidelines to maintain safety and environmental standards․ Proper cleaning and disposal are essential to prevent cross-contamination and ensure a safe working environment for future experiments․ Always follow safety protocols when handling and storing laboratory materials․ This step ensures the lab remains organized and ready for subsequent activities․ Cleaning and disposal are critical for maintaining a safe and efficient laboratory setting․

Data and Observations
Detailed records of flame colors for each metal salt solution are essential․ Observations include noting the distinct hues produced, such as sodium’s bright orange or copper’s blue-green flame․ A data table organizes these results, facilitating comparison with expected outcomes and aiding in the identification of unknown substances․ Accurate documentation ensures reliable analysis and supports scientific conclusions․
4․1 Color Results for Different Metals
The flame test reveals distinct colors for various metals, aiding in their identification․ Sodium produces a bright orange flame, while lithium yields a crimson red․ Potassium results in a lilac-colored flame, and calcium emits an orange-red hue․ Barium creates a pale green flame, and copper produces a blue-green color․ Strontium gives a brilliant red, often tinged with orange․ These characteristic colors arise from electronic transitions in the metal atoms when heated․ The intensity and shade of the flame are consistent for each metal, providing reliable data for comparison․ By recording these results, students can create a reference for identifying unknown substances․ The accuracy of these observations depends on proper technique and equipment, ensuring clear and distinguishable flame colors․ This section documents the specific colors observed during the lab, forming the basis for further analysis and identification of metallic ions․
4․2 Creating a Data Table
A well-organized data table is essential for documenting flame test results․ The table typically includes columns for Metal Ion, Observed Flame Color, and Possible Identification․ Students record the distinct colors produced by each metal salt solution, noting any variations or similarities․ For example, sodium and calcium both produce orange hues but differ in shade․ Barium and strontium have distinct green and red colors, respectively․ The table helps in comparing known and unknown samples, facilitating accurate identification․ Proper labeling and clarity ensure that data is easily interpretable․ This systematic approach allows for efficient analysis and serves as a reference for future experiments․ By maintaining detailed records, students can cross-verify their findings and draw meaningful conclusions about the elements tested․

Common Questions and Answers
Q: What metals produce vibrant flame colors? A: Metals like sodium, copper, and lithium produce distinct colors․ Q: Can flame tests identify all metals? A: No, some metals yield similar colors․ Q: How reliable are flame tests? A: They are reliable for identifying metals with unique colors․
5․1 Frequently Asked Questions About Flame Tests
Q: What is a flame test? A: A flame test is a laboratory procedure used to identify metal ions by observing the characteristic color produced when metal salts are heated in a flame․
Q: Which metals produce vibrant flame colors? A: Metals like sodium, copper, lithium, and strontium produce distinct and vibrant colors․
Q: Can flame tests identify all metals? A: No, some metals yield similar flame colors, making identification challenging without additional tests․
Q: What tools are needed for a flame test? A: Essential tools include a Bunsen burner, metal salt solutions, and clean Q-tips or wire loops․
Q: Can contamination affect flame test results? A: Yes, contamination from other chemicals or improper cleaning can alter flame colors․
Q: Are flame colors consistent across all elements? A: No, some elements like aluminum do not produce clear flame colors․
Q: What safety precautions are necessary? A: Proper handling of equipment, wearing goggles, and avoiding splashing of solutions are crucial․
5․2 Answers to Key Questions
How are electrons excited during a flame test? Electrons are excited when heat energy from the flame is absorbed, causing them to jump to higher energy levels․
Why are some flame colors similar? Similar flame colors occur because different elements can emit light of the same wavelength when excited․
Can flame tests detect low concentrations of ions? No, flame tests are less effective at detecting low ion concentrations, requiring relatively high concentrations for clear results․
Why must a clean Q-tip or wire be used for each test? Reusing utensils can transfer residues, leading to inaccurate results due to contamination․
Are flame tests sufficient for definitive identification? No, they are a preliminary tool; additional tests are often needed for confirmation․
What affects the accuracy of flame test results? Contamination, improper equipment setup, and observer subjectivity can influence results․
Key Concepts and Principles
Flame tests rely on energy absorption, exciting electrons which emit characteristic colors upon returning to lower energy levels, illustrating atomic structure and emission spectra, though limited by concentration and contamination factors․
6․1 Understanding Flame Test Colors
Flame test colors are unique to specific metal ions, resulting from electron excitation when heated․ Each metal emits a characteristic wavelength of light, visible as distinct flame colors․ Sodium produces a bright orange, while lithium emits a crimson red․ Copper yields blue-green, and potassium shows lilac․ These colors are consistent due to the energy levels of the metal’s electrons, which release specific wavelengths when returning to their ground state․ Understanding these colors is crucial for identifying unknown substances․ However, factors like concentration and impurities can affect results․ For accurate testing, pure samples and proper equipment setup are essential․ Observing the outer flame, where the temperature is highest, ensures clearer color detection․ This method is foundational in chemistry for identifying metallic elements, though it requires careful execution to avoid misinterpretation․ By mastering flame test colors, students gain insight into atomic structure and chemical properties․
6․2 Factors Affecting Flame Test Results
Several factors can influence the accuracy of flame test results․ The purity of the sample is crucial, as impurities may alter the observed flame color․ The burner’s flame quality, including its temperature and color, also plays a significant role․ For instance, a contaminated or improperly adjusted flame can lead to misleading results․ Additionally, the concentration of the metal ion in the solution affects the intensity and clarity of the color produced․ Observer bias is another factor, as color perception can vary between individuals․ Environmental lighting conditions, such as ambient light, may also impact the visibility of the flame color․ Finally, some metals produce similar flame colors, making differentiation challenging․ Addressing these variables ensures reliable and consistent results in flame testing․ Regular calibration of equipment and proper training in observation techniques are essential to minimize errors․ Understanding these factors enhances the precision of flame test interpretations․
6․3 The Science Behind Flame Colors
The vibrant colors observed in flame tests are rooted in the atomic structure of elements․ When metal ions are heated in a flame, they absorb energy, exciting their electrons to higher energy levels․ As these electrons return to their ground state, they release excess energy in the form of light․ The wavelength of this emitted light, determined by the energy difference between electron levels, corresponds to specific colors in the visible spectrum․ This phenomenon is known as atomic emission spectroscopy․ Each element has a unique energy level configuration, resulting in distinct flame colors․ For example, sodium produces a bright orange flame due to its specific electron transitions, while copper yields a blue-green color․ This principle is fundamental to identifying metals in a flame test, making it a practical application of quantum mechanics and atomic theory․

Identifying Unknown Substances
Flame tests are a practical method for identifying unknown substances by observing the characteristic colors produced when metal ions are heated in a flame․ This technique is essential for determining the presence of specific metals in a sample․
7․1 Process for Identifying Unknown Metals

The process begins with preparing the Bunsen burner to produce a clean, hot flame․ A clean nichrome wire or Q-tip is dipped into the unknown solution and held in the flame․ Observing the flame’s color, which is characteristic of specific metals, allows identification․ For instance, sodium produces a bright orange flame, while copper yields a blue-green color․ Multiple tests ensure accuracy, especially for metals with similar flame colors․ Cross-referencing results with known data aids in precise identification․ Proper safety measures, such as using protective gear and handling chemicals cautiously, are essential throughout the process․ This method is both efficient and educational, providing hands-on experience with chemical analysis․
7․2 Examples of Identification

Through flame tests, students can identify unknown metals by comparing observed flame colors to known results․ For example, sodium produces a bright orange flame, while potassium yields a lilac color․ Copper salts create a blue-green flame, and calcium produces an orange-red color․ Lithium results in a bright red flame, easily distinguishable from others․ By testing multiple samples and cross-referencing with a data table, students can accurately identify unknown metals․ This method reinforces the understanding of periodic trends and chemical properties․ For instance, metals from the same group often exhibit similar flame colors, aiding in identification․ This practical approach to chemical analysis is both engaging and educational, allowing students to apply theoretical knowledge in a hands-on laboratory setting․ The process also highlights the importance of precise observation and data recording in scientific inquiry․

Safety Precautions
Ensure safety by wearing goggles, securing loose hair, and avoiding loose clothing․ Use tongs for handling hot objects and dispose of chemical residues properly․ Adhere to all lab safety guidelines․
8․1 Essential Safety Measures
To ensure a safe flame test lab experience, several key precautions must be taken․ First, always wear protective goggles to shield eyes from potential chemical splashes or debris․ Tie back long hair and avoid loose clothing that could catch fire․ Keep the lab area clean and clear of flammable materials․ Use tongs or heat-resistant gloves when handling hot objects, and never touch metal salts or equipment directly with bare hands․ Ensure the Bunsen burner is lit and adjusted properly, avoiding tall, uncontrolled flames․ Students should handle chemicals carefully, using clean tools for each solution to prevent cross-contamination․ Dispose of chemical residues and waste according to lab guidelines․ Be prepared for emergencies by keeping a fire extinguisher nearby․ Always follow the teacher’s instructions and maintain focus during the experiment․ Safety is paramount to prevent accidents and ensure a successful lab session․
8․2 Handling Chemicals and Equipment Safely
Proper handling of chemicals and equipment is crucial in a flame test lab to minimize risks․ Always use clean, dry tools like nichrome wires or q-tips to handle chemical solutions to avoid cross-contamination․ Before and after each use, dip the tool in water and rinse thoroughly to prevent residue buildup․ When heating, position the tool in the hottest part of the flame, typically the blue cone, to ensure accurate results․ Never leave the Bunsen burner unattended or point the flame toward people or flammable materials․ Handle metal salt solutions with care, as some may be toxic or corrosive․ Use tongs or heat-resistant gloves when handling hot objects, and keep all chemicals away from open flames․ Dispose of chemical waste in designated containers and wash hands thoroughly after the lab․ Proper handling ensures safety and reliable experimental outcomes․ Always follow lab protocols and seek guidance if unsure about any procedure․ Safety measures protect both students and equipment, making the lab experience both educational and secure․
The flame test lab successfully identified metal ions, showcasing the technique’s effectiveness in chemistry education and its practical applications in identifying elements based on their unique flame colors․
9․1 Summary of Key Findings
The flame test lab demonstrated that each metal ion produces a distinct flame color, such as sodium’s bright orange and copper’s blue-green․ This consistency allows for reliable identification of metals․ Students observed and recorded these colors, creating a data table to compare results․ The lab emphasized the importance of using clean equipment to avoid contamination․ Memorization of flame colors for IA and IIA metals was crucial, though some elements had similar hues, making identification challenging․ Overall, the lab provided practical experience in applying chemical principles to real-world identification tasks, reinforcing the value of flame tests in chemistry education and research․ The technique’s simplicity and effectiveness were highlighted, making it a valuable tool for both students and professionals in understanding elemental properties․
9․2 Importance of Flame Tests
Flame tests are a fundamental tool in chemistry, providing a straightforward method to identify metal ions based on their characteristic flame colors․ This technique is essential for understanding the relationship between elements and their chemical properties․ It introduces students to the concept of atomic emission spectra and periodic trends․ Flame tests are widely used in educational settings to demonstrate practical applications of chemical principles․ They also hold significance in industrial and environmental monitoring, aiding in the identification of metal contaminants․ The simplicity and visual nature of flame tests make them an accessible and engaging way to explore chemical elements․ While modern spectroscopic methods are more precise, flame tests remain a valuable first step in elemental analysis due to their cost-effectiveness and ease of use․ This method underscores the importance of observation and experimentation in scientific inquiry, making it a cornerstone of chemistry education and research․